Switching to pfSense

This is an old post!

This post is over 2 years old. Solutions referenced in this article may no longer be valid. Please consider this when utilizing any information referenced here.

So after several years of successfully using DD-WRT, I finally decided to move to pfSense. There are a multitude of reasons for this move, but I’ll try to enumerate some of them.

Why pfSense?

1. My new house is too big.

I know. First world problems, right?

In 2012, anticipating the arrival of our first child (and while the mortgage rates were low and prices were good), my wife and I bought a new house that was roughly double the size of our old one. While it’s not huge, at 3,400 square feet it’s a pretty large house even by American standards. And large enough that wireless access becomes an issue.

While the size in and of itself wasn’t the main issue, the location of the Internet wiring in a closet upstairs meant that the wireless access point was on the far side of the house. Not centrally located. As a result, the master bedroom at the far side of the house from the access point has noticibly weaker signal.

But, to place a router/access point combo in middle of the house would be tricky because of the layout. The only real solution is to split the wireless access point from the router. Keep the router in the closet and put a separate access point on the ceiling on the second floor, that can cover the entire house.

But couldn’t you add a repeater?

Yes, theoretically, I could add a repeater to extend coverage to the rest of the house. But that is undesirable for several reasons.

First, it’s yet another thing that needs to be maintained. My experience with repeaters has been that, if all parts of the network are not working perfectly, the repeater won’t work. Everything has to be kept in perfect sync. If, say, a power outage happens, and the repeater comes up before the master, too bad. Reboot the repeater.

Second, it adds an additional hop, and additional latency. Not a big deal for mindless web surfing. A very big deal when trying to stream 1080p video. My wife and I have a fully digital media library that streams to all the TVs. Any latency that can be avoided on the network is a must. And, in fact, almost all the TVs are now connected via Ethernet.

So, a repeater is not really what we’re looking for. It’s wired access points. After all, a little cable isn’t a big deal if it fixes the problems.

2. DD-WRT is a hack.

DD-WRT is cool. I’ve been using it for four years now. I’ve turned friends on to using it. It’s really neat that an open-source project is able to do all this cool stuff with off the shelf routers. I really don’t want to take away from what all these guys have accomplished, because they push cheap consumer routers to their absolute max.

But. At the end of the day, it’s a hack. It’s a cool hack, but it’s a hack nonetheless. And it never works quite right - on any of the 8+ routers I’ve tried it on. So hacks pile up on hacks. Scheduled reboots every night to keep things working. External drives attached by USB to store custom configs, and scripts that copy them into place after DD-WRT reboots.

The problem is, DD-WRT is always a step behind the hardware makers. They’re always reverse-engineering the hardware to get DD-WRT to work on it when they can, but they’re still at the whims of the device makers. Even the ones that come with “DD-WRT pre-installed” don’t really work that well. And after awhile, you stop being able to update to newer builds (the last build for one of my routers was from 2012, for instance).

While it’s a cool toy and a nifty way to squeeze more life out of a cheap consumer router, you pretty quickly realize that it’s not a perfect world.

So, if I’m going to separate out the wifi and the router, why not build a custom router? That’s where pfSense comes in.

Enter pfSense

A pfSense box is really nothing more than a standard PC with dual network cards, running pfSesnse. Which is, itself, just a customized version of FreeBSD and additional software, along with a nice web-based GUI.

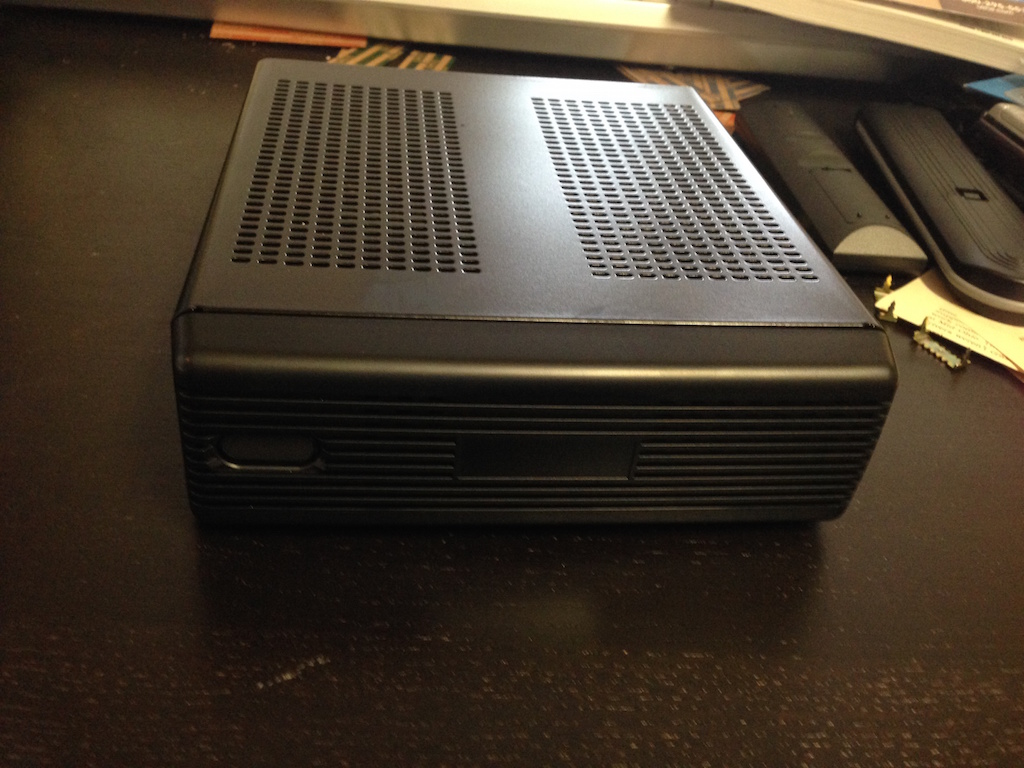
Here’s the machine I built for my router:

Ubiquiti UniFi UAP-AC installed on the ceiling of the main room in my house, near the center. It's just a little bit larger than a smoke detector.

Parts List

Notes

  • I used the “Quick Install” method of the pfSense installer. It worked as expected. The one thing it didn’t do it set up trim on the SSD. So if you have an SSD, you may need to do some research on how you enable it.
  • I use 172.16.104.0/32 for a network range, because I’ve observed that most other people don’t. This makes VPN easier.
  • My OpenVPN setup is identical to the one I used on DD-WRT. The one thing to note is to use UDP and not TCP. I know, it’s weird, but OpenVPN has it’s own built-in error checking. I wasn’t able to even get it to work at all on TCP.
  • You generate keys using the Cert Manager in pfSense under System > Cert Manager. Use the OpenVPN Client Export Package, which will generate downloadable packages that you can use with a wide variety of OpenVPN clients.
  • Here’s some info on running the UniFi access point software on the VPN machine itself. It’s written in Java. Note, when you perform a major upgrade, you’ll probably lose Java. So just go reinstall it and launch the controller software again, and you should be right back where you were.
  • The UniFi software, for some reason, takes a while to come up. Like 4-5 minutes. But once it does it stays up until you shut it down or reboot the machine.
  • When you install the UniFI softare, install the “shellcmd” package, and add the command to launch the UniFi software when you reboot:
/usr/local/openjdk7/bin/java -jar /usr/local/UniFi/lib/ace.jar start &
The pfSense box I built, before installing it in my wiring closet.

Conclusions

I’ve now been running pfSense in my house for about a year. I started on 2.1-release. I later upgraded to 2.1.5-release, and just recently to 2.2-release. All the upgrades were, for the most part, very painless. It literally says “upgrade available,” you click upgrade, and it’s done in 20 minutes. Considering you’re upgrading an entire OS without losing any settings, that’s pretty impressive.

Although when I upgraded to 2.2, I DID lose part of by Ubiquiti installation. But all I ended up needing to do was reinstall Java.

In building a machine, the thing I was worrying about was that this would be another thing I would have to maintain. Fortunately, it “just works.” I only need to do anything on it every few months. It just sits on the wall upstairs quietly routing traffic. I have far, far fewer problems than with DD-WRT based routers or, really, just about any consumer router I’ve ever used. Every few months I might have to reboot the access point, but that’s it. pfSense usually has months of uptime.

So, overall, I’m very pleased with this new setup. It solved many of the problems I was having with my previous setup.

Comments (0)

Interested in why you can't leave comments on my blog? Read the article about why comments are uniquely terrible and need to die. If you are still interested in commenting on this article, feel free to reach out to me directly and/or share it on social media.

Contact Me
Share It
DD-WRT
In my previous entry, I wrote about how awesome DD-WRT is, and how it had replaced a number of network devices allowing me to reduce the number of machines at home I had to administer. I finished the article by talking about how I’d set up a VPN tunnel to the office so multiple machines - namely, my Macbook Pro and my iMac - could access company resources at the same time. But at the end, I mentioned that PPTP was _not _what I was using to connect myself back to my home network when I’m on the road. But why? Two words: broadcast packets. PPTP, by default, does not support the relaying of broadcast packets across the VPN link.* For Mac users, this means Bonjour/Rendezvous based services such as easily shared computers on a network are not accessible as they rely on network broadcasts to advertise their services. PPTP can support broadcast packets with the help of a program called bcrelay. This program is actually installed on DD-WRT routers even, but does not work even though the DD-WRT web GUI claims that they can support relaying broadcast packets. To verify, you can drop to shell and try yourself: root@Eywa:~# bcrelay bcrelay: pptpd was compiled without support for bcrelay, exiting. run configure --with-bcrelay, make, and install. The version of pptpd that ships with v24sp2 of DD-WRT lacks bcrelay support. It’s important to note that this doesn’t mean the services are completely inaccessible. You can still reach them if you know IP addresses. Good for people with and understanding of networking, but not good for people like my wife and definitely not the “Mac way.” So, what options are left, if no PPTP? Enter OpenVPN OpenVPN is a massively flexible (and therefore massively difficult to configure) open source VPN solution. DD-WRT ships with OpenVPN server available with support for broadcast packets, so that is what I decided to use. A couple of notes before you begin. There are some tradeoffs to using OpenVPN. Perhaps the biggest is that it’s not natively supported on any operating system (unlike PPTP). That means on Windows or Mac, you’ll need a third-party client. And it’s not compatible at all with iPhones, iPods or iPads (unless they’re jailbroken). It is also much more difficult to configure that the relatively easy and reasonably well documented PPTP server setup. It was a worthwile tradeoff for me, but it may not be for you. So, before you begin, you’ll need the following: You have already configured your router using DD-WRT and have the most recent release (as of this writing, v24-sp2), VPN version installed. The version number should be in the upper right corner of the web admin. If it says “std” or “vpn,” you’re in good shape. If it says “micro,” you probably don’t have the necessary tools. You possess some basic understanding of networking, and have the necessary settings to complete a VPN connection. If you’ve gotten as far as flashing with third-party firmware, you probably do. You understand that there is the possibility, albeit remote, that you could brick your router. I am not responsible for that, which is why I suggest you purchase an additional router to get all this set up on first before sacrificing your primary router. You’re not scared of the shell. You must sacrifice a goat to the networking Gods. For reference, my network uses 192.168.1.x for addresses. This can cause problems as it’s incredibly common for LANs. You may want to change your addresses to something less common. Not that big a deal for me, though. I also have mine set up in bridged, as opposed to routed, mode. I thing this is smarter (and easier), but if you’re curious, the difference is explained here. The first thing you need to do is install OpenVPN on your client machine. Even if you intend to use something different, you still need to install it so that you can generate all the certificates you’ll need. On a Mac, I find the best way to do this is with MacPorts. toruk:~ peckrob$ sudo port install openvpn2 It’ll crank for awhile compiling and installing what it needs, so go get a snack. Then, once you have it installed, head over to /opt/local/share/doc/openvpn2/easy-rsa/2.0/ and run the following commands: source ./vars ./clean-all ./build-ca ./build-key-server server ./build-key client1 ./build-dh At each stage, it will ask you questions. It is important to provide consistent answers or you will get errors. Importantly, don’t add passwords to your certificates. Once you are finished, you will find all your keys in the keys/ directory. Now, the fun part. Head over to the keys directory (/opt/local/share/doc/openvpn2/easy-rsa/2.0/keys). There should be a bunch of files in there. In a browser, open up your router’s web admin, and go to Services -> VPN. Under OpenVPN Daemon, next to “Start OpenVPN Daemon,” select “Enable” “Start Type,” set to “WAN Up” CA Cert. Go back to your shell and “cat ca.crt”. Past everything between the “—–BEGIN CERTIFICATE—–” and “—–END CERTIFICATE—–” including those two lines. You must include the BEGIN and END for this to work on each one! (This was a major trip-up for me). “Public Client Cert,” go back to shell and “cat server.crt”. Past everything between the “—–BEGIN CERTIFICATE—–” and “—–END CERTIFICATE—–” as above. “Private Client Key,” go back to shell and “cat server.key.” You need everything between “—–BEGIN RSA PRIVATE KEY—–” and “—–END RSA PRIVATE KEY—–” as above. “DH PEM,” go back to shell and “cat dh1024.pem”. You need everything between “—–BEGIN DH PARAMETERS—–” and “—–END DH PARAMETERS—–” as above. The important not above is to include the lines containing “—-whatever—-“. Not doing this cost me about 3 hours of messing around until I figured this out. With that all complete, it’s now time for your server config. Here is my server config: mode server proto tcp port 1194 dev tap0 server-bridge 192.168.1.1 255.255.255.0 192.168.1.201 192.168.1.210 # Gateway (VPN Server) Subnetmask Start-IP End-IP keepalive 10 120 daemon verb 6 client-to-client tls-server dh /tmp/openvpn/dh.pem ca /tmp/openvpn/ca.crt cert /tmp/openvpn/cert.pem key /tmp/openvpn/key.pem The important things here are “dev tap0”, which creates an ethernet bridge and not a tunnel (as “dev tun0” would do), and the “server-bridge” line. The documentation for that line is below it. The start IP and end IP specifies an IP range that VPN clients will receive addresses from. With all this complete, press “Save” and “Apply Settings” at the bottom of the screen. Wait patiently. Then, in the web admin, go to Administration -> Commands. If you already have a Startup script, edit it, otherwise, add this to the commands window: openvpn --mktun --dev tap0 brctl addif br0 tap0 ifconfig tap0 0.0.0.0 promisc up Press “Save Startup.” Then, if you already have rules in “Firewall,” edit those, otherwise add: iptables -I INPUT 2 -p tcp --dport 1194 -j ACCEPT Press “Save Firewall.” Now, reboot your router. When it comes back up, you should have a running OpenVPN server. To check, go to Administration -> Commands, and type this into the command window: ps | grep openvpn If you see something that looks like: 11456 root 2720 S openvpn --config /tmp/openvpn/openvpn.conf --route-up 17606 root 932 S grep openvpn Then it worked. Congratulations, you have a working OpenVPN instance. But how to connect to it? If you use Mac, you really have two choices: Tunnelblick or Viscosity. Tunnelblick is a little on the ugly side and difficult to configure, but is free and open source. Viscosity is reasonably pretty to look at and easier to configure, but is a commercial product. I chose Viscosity, so that’s what I’m demonstrating here. Once you have Viscosity downloaded and installed, go to Preferences and Connections, and add a connection. Enter a name and server address. Set the protocol to TCP and the device to tap. Now, before you continue, go back to your shell. Go back to the /opt/local/share/doc/openvpn2/easy-rsa/2.0/keys directory, and copy those keys someplace in your home (~) folder that you’ll be able to access. Back in Viscosity, go to the “Certificates” tab. You should see three lines labeled “CA,” “Cert,” and “Key.” For “CA,” select the “ca.crt” file you just moved. For “Cert,” select “client1.crt”. And, for “Key,” select “client1.key”. Under the “Options” tab, disabled LZO compression. For some reason this was causing a problem for me, so I just disabled it. Click “Save.” If all is right in the Universe and the goat you sacrificed to the Gods (you did do the goat sacrifice step, right?) was pleasing, you should now be able to connect back to your home network. Broadcast packets will work, and everything will be wonderful.
Read More
DD-WRT
To celebrate the re-launch of my “blog,” I’m going to do a multi-part entry about DD-WRT. But, first, a little history. For the first time in 10 years, I have no servers running in my house. At one point, I had three servers running in here doing various things. Then, I moved my public server offsite (it’s in the rack at the office now). That left two more Gentoo boxes running here in the house. Late last year I picked up a 1TB external hard drive, which I attached to my iMac and deactivated the file server. I will probably eventually replace this with a Drobo FS, but for now it’s fine. That just left a single Gentoo box that was running Asterisk and various network services. But I finally convinced my wife to let me drop the goofy VoIP line that I was paying $30 for and just add more minutes to her cellphone. With Asterisk out of the picture, the only thing left running on that box was network services. Well, a few weeks ago I ordered a TP-Link TL-WR1043ND router, intending to use it as a testbed for DD-WRT. Well, my experiments worked so well that I pulled my old router out and replaced it with the DD-WRT one. The faster processor also afforded a nice speed bump of about 7 Mb/s. With it handling all the services, I pulled out the final server and deactivated it. And my office is blissfully quiet now. DD-WRT is now handling all the minor network services (DHCP, NTP, etc). But what is it about DD-WRT that makes it so awesome - awesome enough to rip out some of my network infrastructure to make way for it? A few things that I will cover in this post. 1. DHCP static address assignments Believe it or not, the built-in firmware of the WRT-54G did not give you the ability to define a static address to be assigned by DHCP based on MAC address. This seems like a glaring oversight to me, but it was the reason I ran my own DHCP server rather than use the built-in ones. In DD-WRT (v24-sp2) you can go to the Services tab and set as many as you’d like. In my case, these are a couple of devices (like printers) that are addressed via IP address by the various machines, as well as my laptop and iMac. So that’s one nice thing, but it’s not nearly as cool as … 2. VPN Support The standard and VPN versions of DD-WRT support both PPTP and OpenVPN varieties of VPN … and I’m actually using both at the same time. My router is both a VPN server and VPN client as well. How? Why? Well, as to why, at dealnews, we run a PPTP-based VPN to allow us to work at home as needed. Once connected, we have access to our testing servers and all our development services. It’s like being directly connected to the work network, but I’m sitting at my iMac at home in my pajamas. I had been connecting directly from my Macs to the VPN for some time but, sitting at home the other day, I reflected on how silly it was that I was connecting two machines to the VPN and only when I needed them, rather than using DD-WRT to have a single tunnel up all the time that any computer on the home network could use if needed. Setting up a PPTP VPN Endpoint using DD-WRT So how did I set it up? Trial and error, as, frankly, the DD-WRT documentation is a bit lacking. So if you find yourself in my position of wanting to have a tunnel to your workplace VPN, hopefully this documentation will help you. I’m making a few assumptions before we begin: You have already configured your router using DD-WRT and have the most recent release (as of this writing, v24-sp2), VPN version installed. The version number should be in the upper right corner of the web admin. If it says “std” or “vpn,” you’re in good shape. If it says “micro,” you probably don’t have the necessary tools. You possess some basic understanding of networking, and have the necessary settings to complete a VPN connection. If you’ve gotten as far as flashing with third-party firmware, you probably do. You understand that there is the possibility, albeit remote, that you could brick your router. I am not responsible for that, which is why I suggest you purchase an additional router to get all this set up on first before sacrificing your primary router. With that out of the way, let’s begin! Log into your router’s DD-WRT web admin, and go to the Services -> VPN tab. Under PPTPD Client, click the radio button next to Enable. In the “Server IP or DNS Name” box, enter your VPN server. In the “Remote Subnet” box, enter the network address of the remote network. In my case, this was 10.1.2.0. In the “ Remote Subnet Mask” box, enter the remote subnet mask. In my case, this was 255.255.255.0. In the “MPPE Encryption” box, I have “mppe required,no40,no56,stateless”. This was required to get mine to work, but may not be necessary for you. Try first without it, then try with it if it won’t work. Leave the MTU and MRU values alone unless you know what you’re doing. Enable NAT. Username and password are self explanatory. WIth that done, press “Save” and “Apply Settings” at the bottom the page. With any luck, you should now have a VPN tunnel up to your remote host. To test it, go to Administration -> Commands, and in the command box, enter the following: ping -c 1 <some remote address on VPN> If you get a response back that looks like: PING <remote service IP> (<remote service IP>): 56 data bytes 64 bytes from <remote service IP>: seq=0 ttl=64 time=281.288 ms --- <remote service IP> ping statistics --- 1 packets transmitted, 1 packets received, 0% packet loss round-trip min/avg/max = 281.288/281.288/281.288 ms Then it’s up and working. Now, try from your computer… Probably didn’t work, did it? This is because your router’s firewall doesn’t yet know about the remote network or to route packets to it appropriately. For some reason, the current version of DD-WRT does not add the appropriate configuration to the firewall automatically when the PPTP tunnel is established. So, we have to do it manually. Go to Administration -> Commands, and enter the following: iptables -I OUTPUT 1 --source 0.0.0.0/0.0.0.0 --destination <remote network address>/16 --jump ACCEPT --out-interface ppp0 iptables -I INPUT 1 --source <remote network address>/16 --destination 0.0.0.0/0.0.0.0 --jump ACCEPT --in-interface ppp0 iptables -I FORWARD 1 --source 0.0.0.0/0.0.0.0 --destination <remote network address>/16 --jump ACCEPT --out-interface ppp0 iptables -I FORWARD 1 --source <remote network address>/16 --destination 0.0.0.0/0.0.0.0 --jump ACCEPT iptables --table nat --append POSTROUTING --out-interface ppp0 --jump MASQUERADE iptables --append FORWARD --protocol tcp --tcp-flags SYN,RST SYN --jump TCPMSS --clamp-mss-to-pmtu At the bottom, press “Run Commands” and wait. It shouldn’t take long, and should produce no output. Then, enter that command again, and press “Save Firewall” at the bottom. Give your router a few seconds to restart the appropriate services, then try again from your computer. Your machine, and all machines on your network, should now be able to access the VPN. In this configuration, only traffic matching the remote network will pass over the VPN - the rest of your traffic will be routed to the Internet in normal fashion. Now, in my next entry, I’ll tell you why I’m not using PPTP to connect myself back to my home network when I’m on the road.
Read More
pfSense
In the year 2021 there are a lot of things that you just take for granted. Remember when you used to have to use jumpers to set things on your computer? Or worrying about IRQ conflicts? Or whether you could get the the drivers you needed to work? These are all parts of the “bad old days” of computers that I don’t miss very much. These days if I plug things into my computer - any of them - I expect them to “just work.” And very often, surprisingly, this is the case. Especially common, well supported things like network cards. So it is notable when I encounter something where that isn’t the case. But first, let’s back up a little bit.
Read More