I have been a SmartThings user for many years. The orginal reason was that, when we bought our current house in 2012, I wanted to turn the eave lights on at sunset and off a few hours later. After a short attempt to use Wifi-based Wemo switches, I settled on SmartThings and GE Z-Wave switches.
I was so happy with it that I started putting them in more places. I added Kwikset SmartCode keypad locks and door sensors. I added more switches, like to turn on the garage overhead lights when the doors opened. I added sensors to monitor the temperature in the closet where I keep my server. And for many years this setup worked great.
But over the last year, and especially since Samsung acquired SmartThings, I have become increasingly disillusioned with the SmartThings ecosystem. This last week, my disillusionment and frustration finally boiled over, and I migrated to a new platform.
So why did I abandon SmartThings?
Remote Processing
One thing that has always bothered me about SmartThings, from the very beginning, is that it is entirely cloud based. Every single event is sent to the SmartThings/Samsung cloud to be processed, and the resulting actions that need to be taken sent back to the SmartThings hub to be acted on.
First, there is the very obvious privacy implication here: Samsung knows every single action that takes place inside my house. They know the exact time my pantry door was open. They know when my garage doors open and close, and can accurately reconstruct my entire weekly routine down to the second. I am sure that data is likely being mined for all it’s worth. Moreover, a hacker who compromised my account or the service itself would have access to all that as well. They could know exactly when I am not home, and proceed to clean the house out.
Second, if your Internet goes down (as ours has a bit fairly recently), none of your stuff works. Seems very silly and very annoying when literally everything that needs to happen can happen entirely within your home.
Finally, it’s just unnecessary. Really, I can’t see a good reason that it was constructed in this way except to data mine. These are not complicated messages we are dealing with here. Receive message X, send messages Y. None of that really needs cloud processing and it could be handled entirely locally.
The New App Sucks
After Samsung bought SmartThings, I was worried something like this might happen. And when the “new” Samsung SmartThings app dropped, I knew my worries were justified.
I am not even going to quibble here: the new SmartThings app is hot garbage.
A lot of functionality that was present in the old app was lost, and the new design is a jumbled, confused mess. Why do I have to navingate to the hub in devices and jump through 3 menus to get to the Z-Wave utilities? What happened to the shortcuts? Why can I not create complex automations anymore?
And for the love of God why did I have to manually migrate all my old rules and automations from the old app to the new one?
I think even Samsung knows the new app sucks, because they haven’t pulled the old one yet. So we’re in this weird inbetween state right now where some things are just not even possible in the new app and you have to fall back to the old app. Then it becomes a regular Where’s Waldo to find where the automation you want is. And then because you have multiple apps installed, you get multiple push messages.
A few months ago I gave up on all this and converted all of my automations to webCore. Which leads me to my next point.
Not Hacker Friendly
If you are a simple home user who wants to do very simple home automations without a lot of fuss, SmartThings is a great platform. But if you are technically adept and want to create complex, expressive rules, it is difficult or impossible to do it natively with SmartThings.
There are some things you can do. If you want to integrate with other services you need to know Groovy and use the SmartThings IDE (which I am kind of wondering how much longer will be available.)
But if you want to write a complex rule, especially in the new app, you just can’t. For instance, I was trying to write a rule that said, given a room with three doors, turn the light off five minutes after the last door closed. Guess what? That is impossible with the new app. You could in the old app, but you can’t in the new app. I probably spent days to reach that conclusion.
So I turned to webCore, which is a third party rules engine for SmartThings that allows you to build complex rules using a DSL. And it is very cool. I eventually migrated all of my automations to webCore just so that I would always know where they were.
WebCore is very cool. I don’t want to take anything away from what they have accomplished because it is very impessive. But ultimately, webCore is a bandaid on SmartThings’ shortcomings. Supposedly Samsung will be introducing a native rules engine “soon.” But then we will have two apps, webCore, and whatever Samsung introduces as well, further confusing an already very complex environment that is supposed to be simple.
Another thing I have always wanted to do was build a nice command dashboard that could be mounted on a wall in the house. And while there are ways to do this with SmartThings, because it lacks a simple straightforward and secure API, you are really limited in what you can accomplish.
Enter Home Assisstant
After search around for an alternative to address the above complaints, I finally settled on Home Assistant. Home Assistant is an open-source home automation system that is predominently written in Python. It runs entirely locally. You only need cloud support if you have integrations that already need them. Otherwise, for a standard Zigbee/Z-Wave setup, all of the processing is handled locally.
Here’s my story of migrating a moderately complex setup from SmartThings/webCore to Home Assistant.
Parts List
-
Raspberry Pi 3B+. I had one of these laying around so I just reused it. If I was building from scratch I would probably use a Raspberry Pi 4.
-
32GB MicroSD Card. I always seem to have a bunch of these lying around.
-
Flirc Raspberry Pi Case. You can use any case you like but this one if my favorite.
-
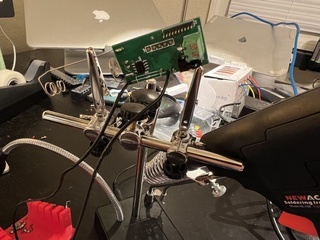
GoControl CECOMINOD016164. This is the meat and potatoes. This stick contains both Zigbee and Z-Wave radios and is natively supported by Home Assistant.
My Existing Smart Home Setup
My existing smart home setup consists of:
- 4 Kwikset Locks (3 Z-Wave, 1, oddly, Zigbee).
- 8 GE/Honeywell Z-Wave Switches
- 2 GE Outdoor Z-Wave Switches
- 3 Plug-in Z-Wave switches
- 5 Monoprice Z-Wave door sensors
- 2 Monoprice Z-Wave garage door sensors
- 2 Monoprice Z-Wave multi-sensors
- 1 Zigbee multi-sensor
- Chamberlain myQ garage door openers
- Rachio irrigation system
- 2 Ecobee thermostats
- 1 Sensibo mini-split controller
- Plex home entertainment system
- Sonos home audio system
A Warning Before Beginning
Home Assistant is a very powerful tool. While there have been a lot of strides over the years to make it more user friendly, a lot of its true power can only be unlocked by directly editing config files. For simple integrations you will likely be able to just use the GUI. But if you start getting complex, you will need to have a working understanding of YAML and know your way around a Linux shell.
Process
I started by installing Home Assistant according to the instruction. The install was mostly painless, but as I was doing the whole thing headlessly (without plugging the RPi into a monitor) the only way I was able to find it’s final IP address was to look at my DHCP server’s address list.
Note that the web interface comes up on port 8123. We’ll fix this in a bit. :)
Configuring Networking and Wifi
One thing that almost immediately needed work is that wifi didn’t come up. It turns out that the preferred way is to use Ethernet. Canonically, this is correct, but in my case I really wanted to use wifi because it would allow me to put the Pi in a more central location in the mesh network.
I followed this guide to enable wifi. One thing to remember is that, when installing the SSH and Terminal add-on, scroll all the way down on the add-on page and configure the username and password. This is sort of unclear, and I lost a couple hours not realizing I needed to scroll down. :)
I also set a static IP address as well. I would highly recommend you do that regardless of whether you use Wifi or Ethernet.
Configuring Z-Wave and Zigbee
The next step was setting up the GoControl Z-Wave/Zigbee USB stick. If you
navigate to /dev on the Pi (using the terminal you installed above), you will
see two USB entries.
/dev/ttyUSB0- Z-Wave/dev/ttyUSB1- Zigbee
To configure these, go to Configure on the side, then Integrations. Then click the “+” orange circle in the bottom corner, and add a Z-Wave integration. Set the USB path to the one above. Now to the same for Zigbee (which is called ZHA in integrations), setting the USB path as above. Now reboot.
Changing The Web Port
Being that I have a long-standing obsession with pretty URLs, I really don’t want to have to remember http://<ip>:8123 when
ha.internal.domain is much easier. So we need to put the web interface on the
standard HTTP port 80. So, in terminal, cd to the config directory and edit
your configuration.yaml file to add this:
http:
  server_port: 80
Save and reboot.
Migrate Cloud Services First
I decided to migrate the cloud services first. This way I could get a feel for the process without completely abandoning SmartThings yet. To start, Sonos and Plex worked out of the box. Home Assistant literally just saw both of them I was able to configure them without any effort.
For the ecobees, this was a bit more complex but is detailed here on Home Assistant’s website. Once you have created the app and have the API key you can add that using the GUI.
For the Sensibo (which controls the mini-split in my front room), you can follow
this guide here. When you
have your API key, edit your configuration.yaml file to add this:
climate:
  - platform: sensibo
    api_key: <your api key>
Reboot and you should now have your Sensibo available. Nicely, you also get the temperature as a separate entity.
The myQ garage door opener follows a similar process but you have to use your username and
password. Edit your configuration.yaml file to add this:
cover:
  - platform: myq
    username: YOUR_USERNAME
    password: YOUR_PASSWORD
Finally, the Rachio irrigation controller. Again, you can follow the integration instructions on the website. When it comes up, you will have individual switches for each of your zones.
Once you have an API key, edit your configuration.yaml file to add this:
rachio:
  api_key: YOUR_API_KEY
That took care of all of my cloud integrations. It took about two hours to set up all of these.
Migrate Each Z-Wave and Zigbee Device Individually
Now it’s time to tackle the big part: migrating all these Z-Wave and Zigbee devices. Very generally, the process is to “exclude” (remove) it first from SmartThings and “include” (add) it to Home Assistant.
When doing the migration, it is best to have a planned approach to how you do this. This is the plan I came up with:
-
Migrate each device individually. This way you don’t lose track of what device is what. When a new Zigbee or Z-Wave device is added, it comes up with a generic “brand name” name that won’t mean anything until you rename it. By doing one at a time, you always know which one is which.
-
Migrate in a zigzag pattern. Z-Wave and Zigbee are mesh network protocols, so devices are relaying messages from the hub to outlying devices. Unless you have a small house, this could result in some devices not being able to reach either the SmartThings or Home Assistant hub to include and exclude.
My detached garage is a good example of where the zigzag pattern came into play. There are three Z-Wave switches in the wall closest to the house, then two Z-Wave sensors further out on the garage door. So I migrated one switch first, then both sensors, then the last two switches.
To start, pick a device. Put SmartThings into exclude mode by (in the new app) going to hamburger menu, Devices, scroll to the hub, hit the three dots in the upper right corner, click “Z-Wave utilites” and then hit “general exclusion.”
For Zigbee devices, you can just select the device and remove.
To include a device in Home Automation, go to Configuration, Z-Wave (at the bottom) and click “Add Node.” Do the process on the node necessary to trigger an inclusion. The new node should appear in the Nodes dropdown. Before doing anything with it, wait until it’s status is Complete.
For Zigbee, go to Configuration, ZHA, Add Devices and follow the instructions for your device.
Once you have a device added to Home Automation, go to Configuration and then
Devices to give it a friendlier name. One thing that I also found is that I had
to change each individual entity ID as well, from something like
lock.kwikset_whatever to lock.back_door_lock. This is not strictly necessary
but you will need this if you want to write complex rules in YAML.
Migrating Sensors
Migrating sensors was the biggest pain, because they are all different types and had different ways of sending the exclude and include settings. The best rule I could find was to put SmartThings into exclude mode (above), remove the battery from the sensor, wait 10 seconds or so and put the battery back in. On most sensors this seemed to trigger an exclude, but on some I had to push the intrusion alarm button inside the sensor to trigger it.
Sometimes it just took several tries. And sometimes I just had to take down the sensor and take it to be physically next to the SmartThings hub before it would unpair.
Then repeat the process on Home Automation as above.
Migrating Switches
Switches were generally quite a bit easier to convert. It was basically put SmartThings into exclude mode and push the switch either on or off. Then repeat this process with Home Automation to include them. The only thing I ran into is that sometimes SmartThings would refuse to unpair them. This seemed to happen with the Honeywell switches mostly. I found that rebooting the SmartThings hub usually resolved this.
Migrating Locks
Important! With Z-Wave locks, the big difference is that you need to press the “Add Node Secure” button instead of “Add Node.”
Locks were also fairly straightforward. Put SmartThings into exclude mode, take the back cover off the lock and push a button. In the case of one of my locks, it was a small white button, on the others it was the “A” button. Then repeat the process to include it in Home Assistant.
Final Migration Steps
It took me about 5 hours total to migrate all those Z-Wave and Zigbee devices, working out to one about every 11 minutes.
Once you are completely done with migrations, I would recommend running “Heal Network” in Home Assistant under Configuration and Z-Wave. This will allow HA to “map” out your mesh network so it knows where all the nodes are and can optimize the routing of messages.
Migrating Automations
At this point, all of your devices are now off SmartThings and in Home Assistant so it is time to do migrations. For me this was fairly easy because I had already migrated all my automations to webCore, so understanding what they did and how they worked was pretty easy.
For the most part the ones I wanted to migrate I could do natively in the GUI. The Home Assistant GUI for building automations is much more full featured than the one in the SmartThings app. Spend some time learning how the Automation editor works.
That said, I did have to drop down to the automations.yaml file, for the
silliest thing. I needed an automation that only runs on weekdays mornings, and
I could not figure out a way to represent that in the GUI, so I ended up doing
this:
- id: '1583806515293'
  alias: School Mornings
  description: ''
  trigger:
  - at: 06:30:00
    platform: time
  condition:
    condition: time
    after: 06:29:00
    weekday:
    - mon
    - tue
    - wed
    - thu
    - fri
  action:
  - scene: scene.school_morning
Oh yeah. And my rule up there about wanting the lights to turn off five minutes after the last door closes? Totally easy to automate in the GUI. I didn’t even need YAML for that.
Conclusions
I’m not 100% there yet. There are still some things I need to get working, like the security function in SmartThings (that they also broke in the new app). But overall it’s pretty clear that this new approach is much more extensible and secure.
It’s definitely not for everyone. You need to have some understanding of Linux and probably basic programming knowledge wouldn’t hurt, but Home Assistant is a pretty well polished product considering it is open source. The UI is logical and well designed and the mobile app is quite good as well. It also has uncommonly great documentation and a very lively community. But beneath the covers is a very powerful system that can do a lot.
SmartThings had a good run, and I’m happy for the role it played in introducing me to the home automation world, but going forward I’m fully onboard with Home Assistant now.
Update May 2022
I am still using Home Assistant and still exceptionally pleased with my decision. All of the above is still accurate as far as the migration steps go. I would add that I have since migrated Home Assistant to a small low-power PC instead of continuing to use the Raspberry Pi. I did this for three reasons:
Experience has taught me that the lifespan for most SD cards when used in Raspberry Pi’s is about 18 months to two years. So to head that off I went ahead and moved it to a real PC.
Even this old 2012-era Celeron in a small form factor box is multiple times faster than the Raspberry Pi 3B I was using before. Updates and reboots no longer take 10+ minutes.
As of this writing, Raspberry Pi’s are very difficult to acquire due to various supply chain issues. So being able to reuse that Pi for other projects is pretty useful, whereas I had this old PC sitting in a closet doing nothing.
Update March 2024
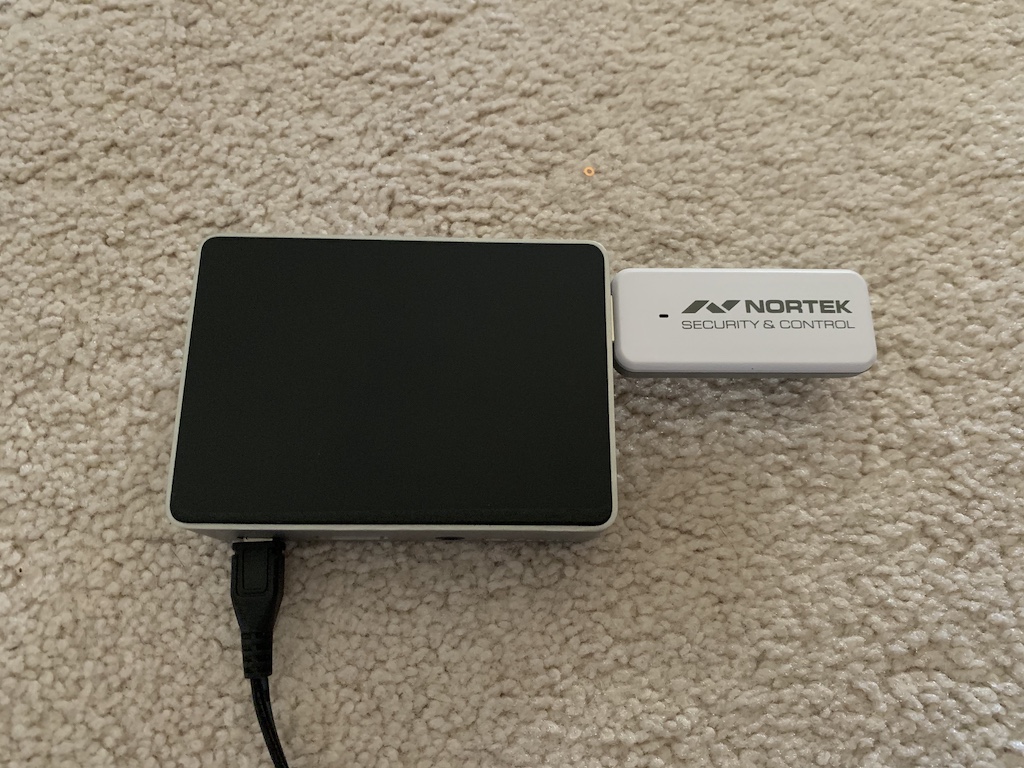
I have since upgraded Home Assistant again, this time to an Intel NUC. The old Celeron was dying and starting to have performance issues. I am now using separate antennas for Zigbee and Z-Wave using the following parts:
- HomeSeer SmartStick+ G3 Z-Wave Plus
- SONOFF Zigbee 3.0 USB Dongle
Unfortunately, this meant re-pairing all my old Z-Wave devices, which was kind of a gigantic bummer.
Presentation
Interested in learning more about this article? I recently gave a talk about my experience converting to and using Home Assistant. Feel free to check it out and watch the video: