You can actually still buy modern versions of these, and they are often options
available from high-end homebuilders. Many are wireless these days; some even
include video.
In our case, the size of the house tends to mean lots of yelling from room to
room. Especially when my daughter may be upstairs in her room with the door
closed and we’re downstairs in the bedroom, getting someone’s attention in here
can be a bit of a challenge at times.
But just buying something isn’t hacker friendly, not to mention expensive. And,
anyways, I needed something fun to hack around on in the evenings for a week or
so. It turns out that this works pretty well, although it definitely took some
work to get everything set up and going.
The Phones
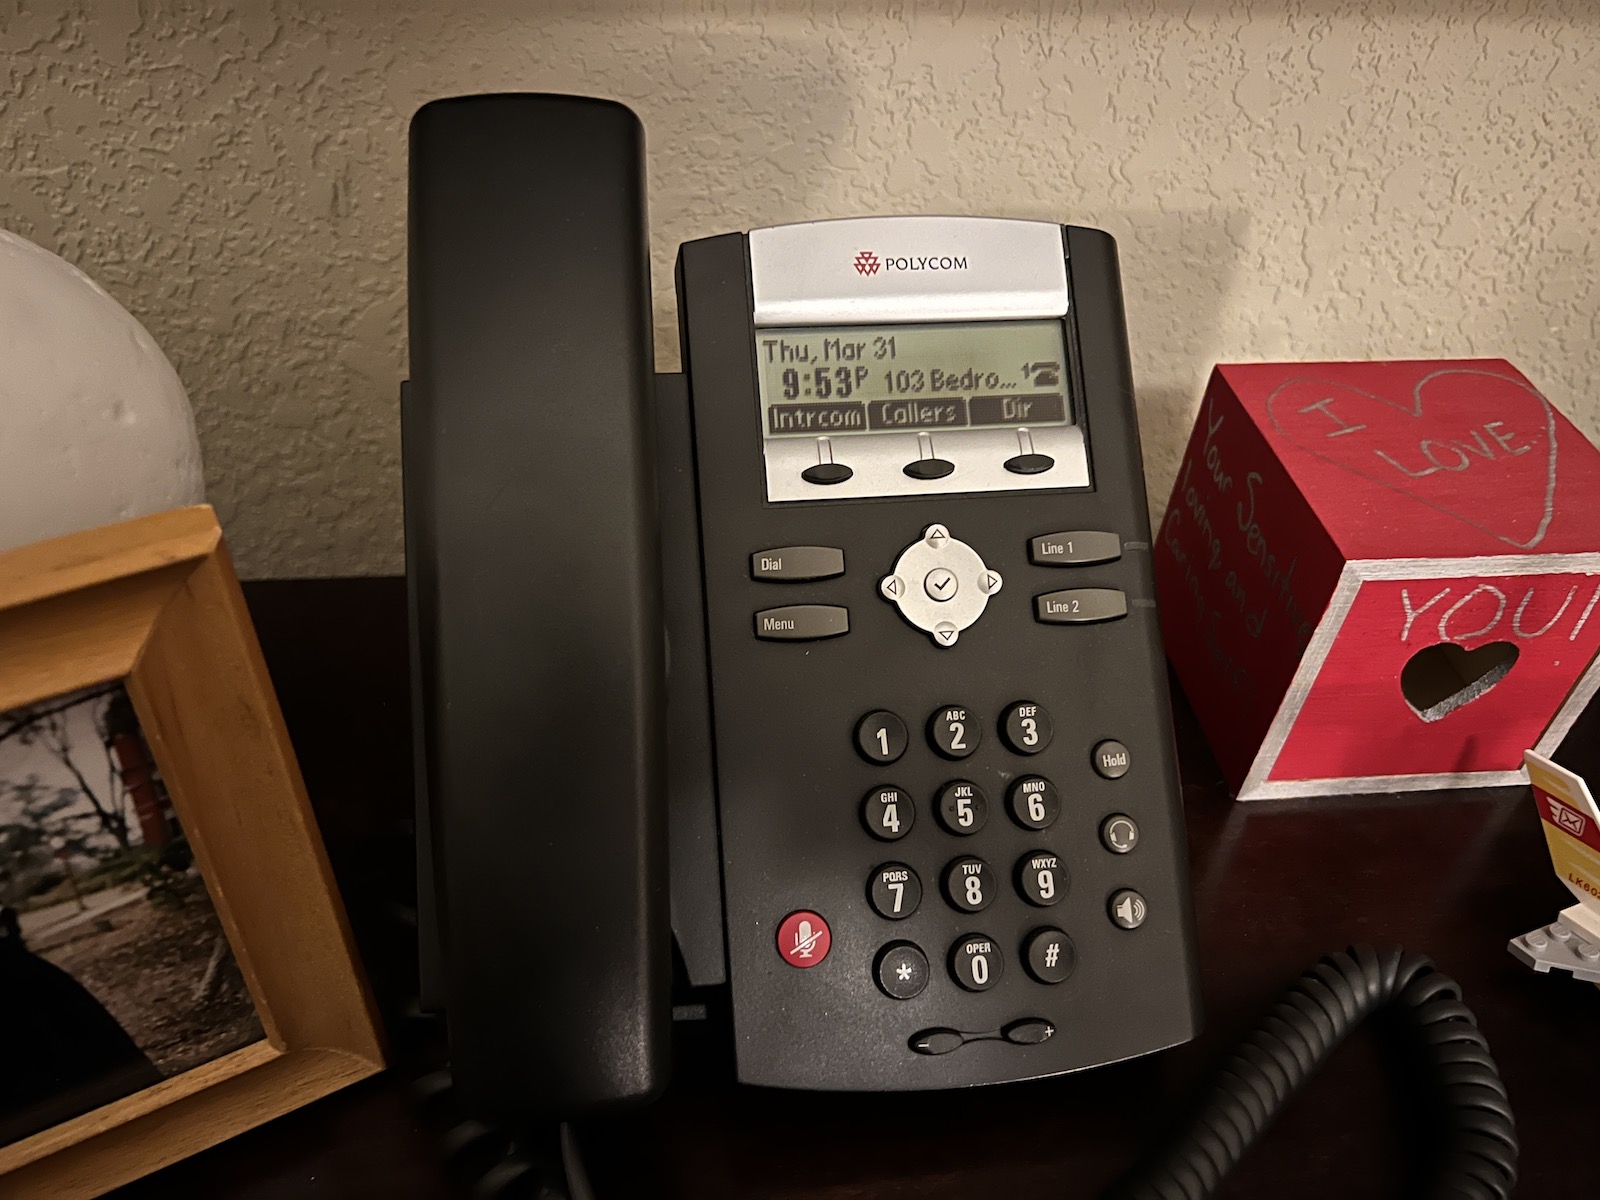
The phones I acquired were mostly Polycom IP330s, with I think one or two
IP331s. These are positively ancient phones but are perfectly suitable for what
we are doing here. In my case these were free (I kept them from ending up in a
dumpster) but you can get them on eBay for about $20 each right now. So this is
a pretty cheap or free experiment.
Install Asterisk
If you just stumbled into this article, you may be wondering what Asterisk
is. Asterisk began life as an open-source PBX (Private Branch eXchange),
basically a telephone system for businesses. Mark Spencer needed a phone system
for his Linux support business, but didn’t want to buy a ridiculously expensive
system from someone like 3Com, so he created a software phone system. These days
Asterisk is used everywhere from businesses to hotels to telecom carriers
themselves.
My first job out of Auburn was as a consultant building telecom systems around
Asterisk and various other related technologies. Though I have been out of the
telecom game now for a good 16 years, I thought this might be a chance to get
back into it and see what all had changes.
First, I tried to do this using FreePBX. And what a disaster that was. I won’t
elaborate futher on that other than to say I am not impressed with FreePBX.
Let’s use just vanilla Asterisk for this. And to do that, we’re going to build
Asterisk from source because what is in the apt tree is probably pretty far out
of date.
First, install the dependencies.
$ sudo apt update
$ sudo add-apt-repository universe
$ sudo apt -y install git curl wget libnewt-dev libssl-dev libncurses5-dev libsqlite3-dev build-essential libjansson-dev libxml2-dev  uuid-dev
Next, let’s fetch the Asterisk source code.
$ cd /tmp
$ wget http://downloads.asterisk.org/pub/telephony/asterisk/asterisk-18-current.tar.gz
$ tar xvf asterisk-18-current.tar.gz
$ cd asterisk-18*/
$ sudo contrib/scripts/install_prereq install
Next, install the MP3 decoder. This is not strictly necessary but if you want to
use MP3 music, you’ll need it.
$ contrib/scripts/get_mp3_source.sh
Now, it’s time to build Asterisk itself.
$ ./configure
$ make menuselect
From here you can select any addons you want to have. Unless you know what you
are doing the defaults will be fine. The one thing you probably should do is
check that you are installing at least one Core Sound package in ULaw.
Now, it’s time to compile.
$ make
$ sudo make install
$ sudo make samples
$ sudo make config
$ sudo ldconfig
Create your user accounts.
$ sudo groupadd asterisk
$ sudo useradd -r -d /var/lib/asterisk -g asterisk asterisk
$ sudo usermod -aG audio,dialout asterisk
$ sudo chown -R asterisk.asterisk /etc/asterisk
$ sudo chown -R asterisk.asterisk /var/{lib,log,spool}/asterisk
$ sudo chown -R asterisk.asterisk /usr/lib/asterisk
$ sudo chmod -R 750 /var/{lib,log,run,spool}/asterisk /usr/lib/asterisk /etc/asterisk

$ sudo vim /etc/default/asterisk
#Uncomment AST_USER and AST_GROUP to look like below
AST_USER="asterisk"
AST_GROUP="asterisk"

$ sudo vim /etc/asterisk/asterisk.conf
runuser = asterisk ; The user to run as.
rungroup = asterisk ; The group to run as.
And finally, install and enable Asterisk.
$ sudo systemctl restart asterisk
$ sudo systemctl enable asterisk
You should now have a working Asterisk install. Most of these instructions came
from this article.
Configuring Phone Accounts
Next, we need to start configuring phones to register with Asterisk. First,
we’re going to make PJSIP, which is the new SIP package in Asterisk, use
.conf.d Debian/Ubuntu style configs.
$ cd /etc/asterisk
$ mkdir pjsip.conf.d
$ echo "#include pjsip.conf.d/*.conf" >> /etc/pjsip.conf
Now, Asterisk will include all the files in /etc/asterisk/pjsip.conf.d. Next,
we need to make a configuration for a phone. We’re going to make a template to
help us:
$ vim 0000-phoneprov_defaults.conf
And fill it with this data:
[phoneprov_defaults](!)
type=phoneprov
PROFILE=polycom
SERVER=<your server name or IP address>
TIMEZONE=America/Chicago
Next, grab a Polycom and get the MAC address off the back of it. Create a new
config file in /etc/asterisk/pjsip.conf.d:
[103]
type=endpoint
context=default
disallow=all
allow=ulaw
auth=103-auth
outbound_auth=103-auth
transport=transport-udp
aors=103

[103-auth]
type=auth
auth_type=userpass
password=103
username=103

[103]
type=aor
max_contacts=1

[103](phoneprov_defaults)
endpoint=103
MAC=<mac address goes here, all lowercase>
DISPLAY_NAME=Office
LABEL=103 Office
CALLERID=103
Repeat the last step for each phone
Enable Phone Provisioning
Provisioning is the process of telling a phone what config to use to talk to the
server. While you can do this manually on each phone, Asterisk has built-in
ability to automatically provision phones for you. In some cases this can be done
without you even having to touch a phone!
First, edit /etc/asterisk/http.conf and enable the HTTP server:
enabled = yes
bindaddr = 0.0.0.0
Then, edit /etc/asterisk/manager.conf and enable the management interface and
web interface:
[general]
enabled = yes
webenabled = yes
Next, you will need to fetch the Polycom firmare. As the phones I am using are
discontinued, there are no links on the Polycom website to download old
firmware. But, fortunately, all they did was remove the links so you can still
fetch them:
$ mkdir -p /var/lib/asterisk/phoneprov/configs
$ cd /var/lib/asterisk/phoneprov/configs
$ wget https://downloads.polycom.com/voice/voip/uc/Polycom_UC_Software_3_3_5_release_sig_combined.zip --no-check-certificate
$ wget https://downloads.polycom.com/voice/voip/uc/Polycom_UC_Software_3_3_5_release_sig_split.zip --no-check-certificate
$ unar -D Polycom*
$ rm -rf *.zip
The phones I am using, mostly Polycom IP-330s, this is the most recent firmware
they support. The IP-331s support a slightly newer version, but I wanted to just
have everyone on the same version to reduce potential troubleshooting problems.
So everyone gets firmware version 3.3.5.
The next step will depend on what you are running at home for your network DHCP
server. Polycom phones will look at certain DHCP options for hands-off
configuring. So you will need to configure your DHCP server to send the
following options:
- Option 160:
http://<server IP or host name>:8080/phoneprov/
- Option 101:
America/Chicago (or your timezone)
- Option 100:
CST6CDT,M3.2.0,M11.1.0 (or your time code)
Give Asterisk a restart to be sure everything is updated:
$ systemctl restart asterisk
Finally, test out your config by pointing your browser to
http://<server IP or host name>:8080/phoneprov/<your phone mac address>.cfg.
If you see some XML, everything is working!
If you are lucky, your phone will automatically download the latest config from
your Asterisk server and restart in a clean config. But if your phone was locked
down by its previous owner you will need to factory reset them. This article
was very helpful and even included a tool that gives you the exact key presses
you will need to enter to reset it.
So, now we have phones configured and registered with Asterisk, we can
finally start actually building the intercom. There’s several ways you can
do this. In my case, because I eventually intend to also hook these phones up to
a SIP provider, I am going to create a queue. Eventually the queue will seve as
an entry point for outside callers, but its members will also be the devices
that are part of the intercom.
Like above, we are going to create a .conf.d directory:
$ mkdir -p /etc/asterisk/queues.conf.d
$ echo "#tryinclude queues.conf.d/*.conf" >> /etc/asterisk/queues.conf
$ cd /etc/asterisk/queues.conf.d
$ vim default.conf
Now, inside this file we will add all the phones:
[default]
strategy = ringall
timeout = 10
retry = 5
maxlen = 1
joinempty = yes
leavewhenempty = no
context = default
periodic-announce-frequency = 60
periodic-announce = calling

member => PJSIP/101
member => PJSIP/102
# Add each member here
Next, we are going to update our dialplan. The dialplan is pretty much the core
of Asterisk. It tells Asterisk what steps to take when it receives a call.
First, again, we’re going to do the .conf.d thing:
$ mkdir -p /etc/asterisk/extensions.conf.d
$ vim /etc/asterisk/extensions.conf
Now, I would suggest you remove just about everything in this file where the
large block comments at the top end. Then add this:
#include extensions.conf.d/*.conf
Then, create a new file:
$ vim /etc/asterisk/extensions.conf.d/default.conf
Below is the dialplan I have configured. I have added inline comments to explain
what is happening:
; Default is the context. Calls coming into Asterisk start in a context. If you
; reference above where we said context=default in the PJSIP phone configs, this
; is what that does.
[default]

; This is the "operator" extension. It places the caller in a queue, that rings
; all the phones until someone answers, like a traditional house phone.
exten => 0,1,Answer
exten => 0,n,Wait(1)
exten => 0,n,Queue(default)

; Extension 0000 is going to be our full house intercom extension. What we're
; doing here is using a little Asterisk variable magic to fetch the queue
; members and convert them to a SIP dial string. If you were just paging a
; single phone, it would be something like Page(PJSIP/101). Multiple phones are
; concatenated with an &. So the end result is like Page(PJSIP/101&PJSIP/102)

; We also have a macro that adds a special header to the SIP call. We'll get to
; that in a bit, but that's what the b(ring-answer^addheader^1) does.
exten => 0000,1,Answer
exten => 0000,n,Wait(1)
exten => 0000,n,Page(${STRREPLACE(QUEUE_MEMBER_LIST(default),",","&")},b(ring-answer^addheader^1))

; This lets us intercom specific phones by dialing 0000 + an extension. So
; 0000101 for the office. Same with the ring header.
exten => _0000[12]XX,1,Answer
exten => _0000[12]XX,n,Wait(1)
exten => _0000[12]XX,n,Page(PJSIP/${EXTEN:4},b(ring-answer^addheader^1))

; This is a standard direct-dial phone to phone call.
exten => _[12]XX,1,Dial(PJSIP/${EXTEN})

; This macro is key. Polycom phones have the ability to automatically answer if
; a specific SIP header is sent. This adds that header. We will configure the
; Polycoms to answer on this header below.
[ring-answer]
exten => addheader,1,Set(PJSIP_HEADER(add,Alert-Info)=Paging)
exten => addheader,n,Return
So, give Asterisk a restart:
$ sudo systemctl restart asterisk
And try placing a phone-to-phone call. Hopefully that should work!
Wow, this has been a journey! I applaud you for sticking with this; it took me
several evenings of work to muddle my way through this with just enough telecom
knowledge from my previous job (16 years ago…) and remembering all the stuff I
forgot about Asterisk. But we’re almost there.
As I mentioned above, Polycom phones have the ability to automatically answer if
a specific SIP header is sent. We are now sending those headers, so we need to
configure the phones to receive it.
Open up the Polycom sip.cfg file:
$ vim /var/lib/asterisk/phoneprov/configs/sip.cfg
It’s a giant pile of XML vomit, but you’ll need to navigate down the following
path: polycomConfig -> voIpProt -> SIP and add the following XML:
<alertInfo
    voIpProt.SIP.alertInfo.1.value="Paging"
    voIpProt.SIP.alertInfo.1.class="custom1" />
Next, where the </voipProt> tag closes, add this:
<se.rt>
    <se.rt.custom1
        se.rt.custom1.name="Paging"
        se.rt.custom1.ringer="ringer15"
        se.rt.custom1.timeout="800"
        se.rt.custom1.type="ring-answer">
    </se.rt.custom1>
    <se.rt.default se.rt.default.timeout="5000">
    </se.rt.default>
</se.rt>
Restart your phones and try dialing 0000. If everything works, the other
phone(s) should automatically pick up.
The Polycom IP330 has three “soft buttons” that can be defined by configuration.
Next, we are going to replace the rather-pointless “NewCall” soft button with a
much more functional “Intrcom” button.
Open up the Polycom sip.cfg file:
$ vim /var/lib/asterisk/phoneprov/configs/sip.cfg
Navigate back down to polycomConfig -> voIpProt -> SIP. Add the following XML:
<feature
    feature.directedCallPickup.enabled="1"
    feature.enhancedFeatureKeys.enabled="1" />

<softkey
    softkey.1.label="Intrcom"
    softkey.1.action="$FLine1$0000$Tinvite$"
    softkey.1.enable="1"
    softkey.1.use.idle="1"
    softkey.2.label="Intrcom"
    softkey.2.action="$FLine1$$FDialpad0$$FDialpad0$$FDialpad0$$FDialpad0$$Tinvite$"
    softkey.2.enable="1"
    softkey.2.use.dialtone="1"
    softkey.feature.newcall="0"
    softkey.feature.endcall="0" />
So let’s go through what we’re doing here:
-
Enabling enhancedFeatureKeys. This is required to allow us to define our own
softkeys.
-
softkey.1.* creates an “Intrcom” key that dials a call when the phone is
idle. This means when the receiver is on the hook and the speakerphone is
off.
-
We’ll take apart $FLine1$0000$Tinvite$:
$FLine1$ Selects phone line 1. The Polycom IP-330 supports two lines.0000 sends 4 zeros.$Tinvite$ sends a SIP invite - basically connects the call.
-
softkey.2.* creates an “Intrcom” key that dials a call when the phone is
sending dialtone. Like when you have picked up the receiver or pressed the
speakerphone button. Why does this have to be a separate config? Your guess is
as good as mine but I could not get it to work with a single key. I got errors
when I tried to use the “Intrcom” key with the receiver off, but this works.
-
We’ll take apart $FLine1$$FDialpad0$...:
$FLine1$ Selects phone line 1.$FDialpad0$... manually triggers the 0 dialpad key. This is necessary.
Trying the 0000 trick above does not work.$Tinvite$ connects the call.
So now, with a single button press, you can intercom all the phones in the
house! It all actually works!
Conclusions
This was a fun experiment and a great way to recycle some old phones that were
going to be thrown away into something useful at home. And from here, with a
standard Asterisk install, you have all the usual possibilities that gives you.
My next step will be to find a cheap SIP provider and maybe we’ll actually have
a “home phone” again for the first time in ages. But even without that, it’s
useful just as an intercom alone.
Presentation
Interested in learning more about this article? I recently gave a talk about my
experience building the intercom and using Asterisk at home. Feel free to check
it out and watch the video: